Like my last post, this one will continue to focus on common painting techniques. Again it is not a tutorial, but rather a chance to present some examples and to inspire your imagination. This post covers layering and edging as a means of highlighting a model.<
There are three sets of Turbo Dork turboshifts that were created for layering over each other (Cheat Day with Sugar Rush/Sweet Dreams/Let Them Eat Cake, Chill Out with Crystal Cavern/Ice to Never/Wave Length, and Sky Above with Cloud Nine/Miami Sunset/Lunar Eclipse). However, this begs the question as to what would I do for some of the other paints. So this post presents a couple of my thoughts to get you going.
BLUE RASPBERRY EXAMPLES:
I started simple. Blue Raspberry continues to be one of Turbo Dork's most popular turboshifts. So I wanted to try out layering color over it as well as layering it over others.
The first composite photo shows examples of Behir models primed with black followed by Blue Raspberry with or without further highlighting.
- Top - No highlighting
- Middle - Highlighted with metallics (Cool Ranch/Murple/Sakura)
- Bottom - Highlighted with turboshifts (Let Them Eat Cake/Crystal Cavern/Sugar Rush)
One can see in the Metallics photo that the colors of the figure did not substantially change but the overall look did. The use of Cool Ranch gave some depth to the figure, particularly to the scales on the back which were further highlighted with Murple and edged with Sakura. It should be noted that the Sakura shows up as more of a silver than pink due to the dark blue over which it was painted.
In contrast, it seems that the basic colors along the back of the Behir shown in the Turboshifts photo shifted slightly. There is a darker pink and some orange on the scales along the back. In addition, since the scales were not grounded with a solid color, the depth seen with the other figure did not develop.
The second composite photo using Blue Raspberry shows examples of three Behir models painted with either Blue Raspberry or Cool Ranch.
- Top - Blue Raspberry with no highlighting
- Middle - Cool Ranch with no highlighting
- Bottom - Cool Ranch highlighted with Blue Raspberry and Blue Steel
As shown in the Layered photo, using Blue Raspberry over Cool Ranch tamed the bright blue of the Cool Ranch, giving it a more subdued pink/purple tone. In addition, edging with Blue Steel helped bring out the depth of the scales on the back.<
TWIN SONS EXAMPLES:
Twin Sons is a zenishift, appearing different over a black primer (green), then a white one (blue). For my next set of examples, I played around with highlighting the two extremes using on different models. For simplicity, I wanted to avoid trying to do everything on a single figure. <
I primed models of Carrion Crawlers, one with black and one with white, and then painted the figures with Twin Sons. I then highlighted them with different paints. It should be noted, as shown in the photos below, that there is a bit of green-blue shift still observable with the figure using the black primer. The blue-green shift with the figure over white is much less noticeable.
Top Row - Twin Sons over black
- Top Left - No highlighting
- Top Right - Highlighted with Laserface/Ill Gotten Gold
Bottom Row - Twin Sons over white
- Left - No highlighting
- Right - Highlighted with Crystal Cavern/ Sakura
As seen in the photos, using a turboshift (Laserface or Crystal Cavern) over Twin Sons gives the figures a subtle change in color --- adding red to the figure over black and pink to that over white. Edging with Ill Gotten Gold or Sakura helps add more depth to the figures.
SPORE EXAMPLES:
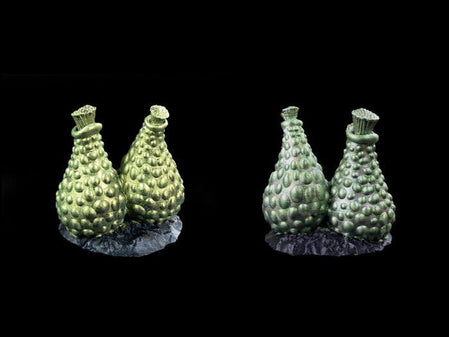
As my last set of examples, I chose to play around with several different paints on a group of 3D printed Large Alien Spores. I primed the Spores appropriately and painted them with different turboshifts (Malum Malus, Mother Lode, or Molten Mantle), followed by highlighting with different turboshifts and metallics. Yes, I know Malum Malus is classified as a metallic but it does have some green-gold shifting going on.
Top - Malum Malus
- Top Left -No highlighting
- Top Right - Highlighted with Seafood/Shell Shocked/Matcha
Middle - Mother Lode
- Left - No highlighting
- Right - Highlighted with Sakura/Sparkle Motion
Bottom - Molten Mantle
- Left - No highlighting
- Right - Highlighted with Life on Mars/Bullion
PARTING COMMENT:
My intent in doing this post was to give you something to think about for your next project. Adding some highlighting to your models, even if it is fairly simple, can add life to them. As always, be sure to post your creations on social media such as the Turbo Dorks Facebook Group. I want to see what you have come up with.


